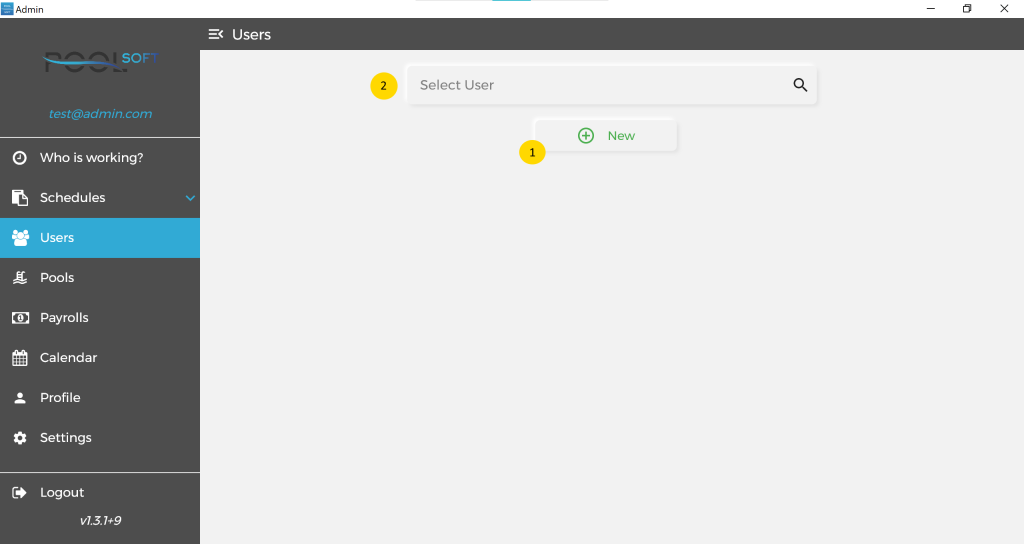
On that screen you can either create a new user in the system (1*) or search to find an user (2*).
If you click on New button (1*) will redirect you to a new screen where you can register a new user.
In the Select User field (2*) you will be able to see all users in the system (clients and employees). When you start typing in the field a filtered suggestions will start popping out

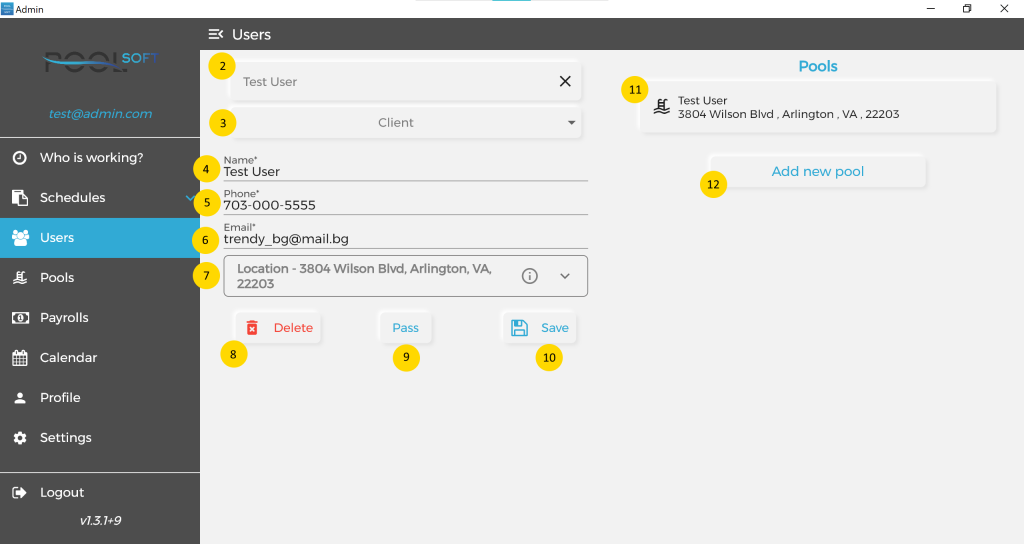
Once you select a user, all data related to that user will appear.
Each user has type (3*), name (4*), phone (5*), email (6*) and location (7*).
Only the email of the user is not editable, this email is used as a username for login in the system.
All of these fields are required except for location (unless the user is with the type Service).
For the location form please use it’s own info button to get information how to use it.
The type of the user (3*) can be Client, Service, Service External, Admin and Owner.
You can change the user’s type in any direction from client to employee and vice versa. Only users with type Owner can create or change another user to Admin or Owner.
Type Owner is something special and is equal to super user. To activate an Owner you will need to contact Pool Soft support to authorize the update.
After any change on that screen you will have to Save (10*) the changes before to leave.
From Pass button (9*) you can send a reset email to the user. It is similar to clicking on the forgot password button on the login screen for the user.
Delete button (8*) is visible to Owners only, on click will ask you if you want to delete only the user and keep the pools and reports or to delete everything. If you decide to delete only the user, then these pools will remain without an owner and you when you need to work on them again will have to assign a new owner from pool details page.
If the selected user is a Client you will be able to see it’s pools (11*) and access them.
Also add a new pool (12*).

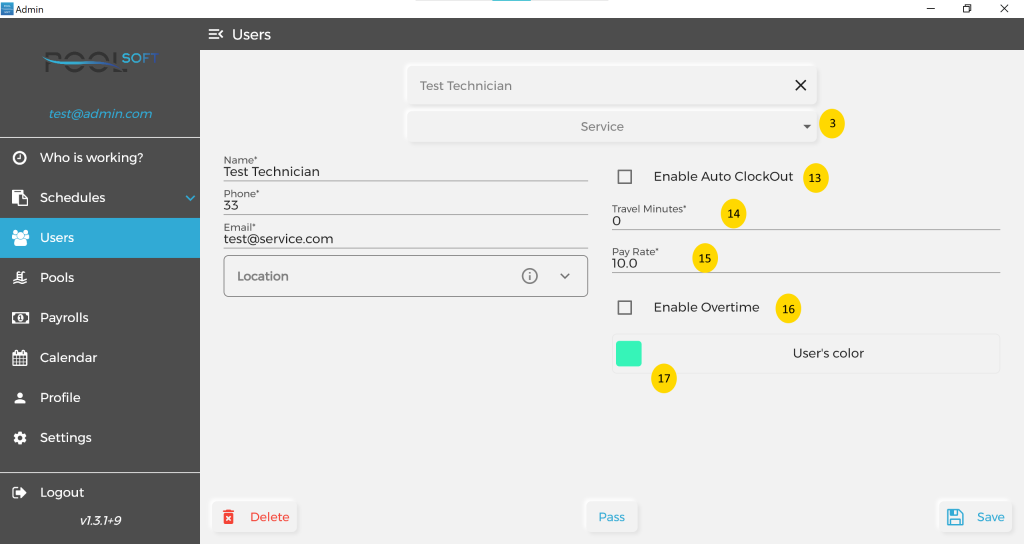
If the selected user is an employee you will see some extra fields instead of pools.
Those fields are more important if the user is a Service type. In that case the location is required as will be needed for the Service app to calculate the best route for the day that will end with the user’s address (if that option is selected).
Enable Auto ClockOut (13*) will auto clock out the user when the last report is submitted from its daily schedule.
Travel minutes (14*) are related to Auto Clock out and will be appended to the clock out time. For example, if the technician sends its last report at 6:00 pm and the set travel minutes are 20, then he will be clocked out at 6:20 pm.
Pay Rate (15*) is the hourly pay rate that this employee gets. It is visible to Owners only, also is required as used for payroll calculations.
Enable Overtime (16*) is an option used for payroll calculations as overtime will be calculated for each week that has more than 40 hours clocked.
User’s color (17*) is a custom color to identify the user. It comes handy when you create schedules or want to view on the map all schedules for a day, then the visits are selected with user’s color.